
So you have your new fancy camera and you’ve had a play figuring out the buttons and you’re ready to take it off auto mode and get into the nitty-gritty of manual shooting. Shooting in manual can seem a bit overwhelming at first, but it’s worth it. Manual mode gives the photographer complete control when it comes to how exposed a photo looks, what’s components of the photo are in focus, how much depth of field definition you have.
One of the best things about shooting in manual is there is no magic formula that works best for every shot. The beauty in manual shooting is it’s completely tied to the photographer’s personal style and composition goals. Everything you read about manual shooting should be used as a guide only but feel free to experiment on your own to find what settings work best for you.
Quick Reminders
Aperture:
As a reminder, aperture refers to the size of the opening in the lens that lets light onto the sensor. Its main function is to give the photo depth of field. A photo with a subject in focus with a blurry background has a wide aperture. Aperture is measured in numerical values called f-stop values. The smaller the number, the larger the opening in the lens and the more light is let through the camera.
ISO:
ISO refers to the sensor’s sensitivity to the light that enters the camera. A higher ISO means your camera is more sensitive to light and is used for capturing photos in low light scenarios. Conversely, a low ISO means the camera is less sensitive to light and is used mostly in bright light conditions. Keep in mind that the higher the ISO, the more grain and noise you’ll likely have in your photo.
Shutter Speed:
The shutter speed is the amount of time the shutter is open, allowing light onto the sensor. The longer the shutter speed, the more light is let in. A longer shutter speed is often associated with more motion blur whereas a faster shutter speed is used to freeze motion, capturing most details of the photo in focus. Night and astro photography relies on a long shutter speed, allowing light on the sensor for a long time in low light conditions. A long exposure is also often used when capturing running water. A long shutter speed will make the water smooth and silky while keeping all other aspects of the photo in crisp detail.
Understanding the Exposure Triangle

The exposure triangle is an easy way to grasp the three pillars of photography and how they work in conjunction with each other. When shooting on manual, changing one element of the exposure triangle will also have an effect on the other two elements of the exposure triangle.
Below is a great cheat sheet infographic for Aperture, ISO and Shutter Speed created by Daniel Peters from Photo Blog Hamburg.

General Rules of Thumb:
Bright winter landscapes: When shooting in bright conditions where you want to have most of the scenery in focus, you’ll want to select a narrow aperture (f/11 or higher). Because a lot of natural light will be present, you can also afford to have a fast shutter speed. This will reduce image blur and let in just the right amount of light. In bright conditions, it’s best to keep your ISO low. This reduces how sensitive the sensor is to light and keeps the noise down.
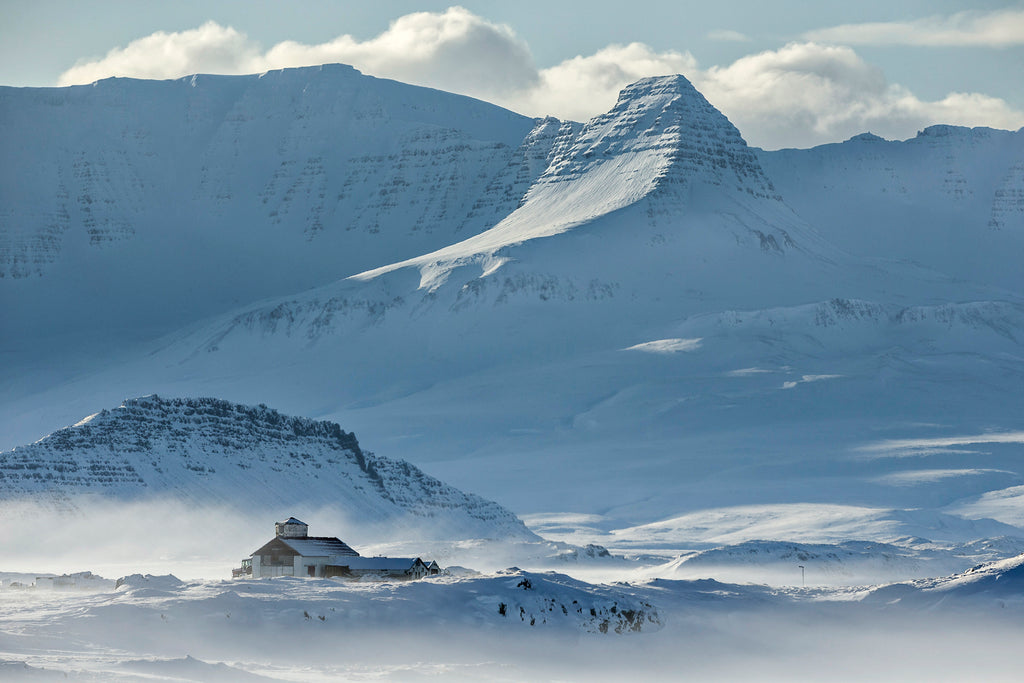
Photo by Lee Gale
Winter action photography: In action sports, the most crucial element of your exposure is being able to freeze motion. This is going to require a fast shutter speed. Depending on the sport, we recommend at least 1/250. From there, adjust your aperture. We recommend keeping most of the scene in focus so an aperture of f/11 or higher will achieve this. Depending on how bright the conditions are, you may need to bump up your ISO slightly to compensate for the fast shutter and narrow aperture, both which reduce the amount of light let into the camera.

Photo by Dominik Wartbichler
Winter wildlife photography: When shooting wildlife, photographers often aim to have the subject in sharp focus with the other elements of the background blurred. To achieve this, you’ll want to have a wide aperture (f/2). Often for fast moving wildlife, it’s necessary to have a very high shutter speed to reduce motion blur. We recommend at least 1/125. When shooting in light, sunny conditions, these settings should still allow you to keep your ISO low to reduce noise.

Photos by Sam Wartley
Winter Portraits: Depending on how bright the conditions are, winter portrait settings will be similar to wildlife photography settings. Keep the aperture wide (f/2 or f/1.4) to keep the sharp focus on the subject leaving the rest of the photo blurred. A shutter speed of 1/125 or higher should be sufficient to capture the normal motions of your subjects. Adjust your ISO according.

Night photography: When shooting the night sky or the Northern Lights, you’ll be dealing with very low natural light so you’ll need to adjust your settings to get the maximum amount of light onto your camera sensor without compromising the quality of the photo. For night photography, the first thing you’ll want to do is open up the aperture as wide as your lens will allow (f/1.4 or f/2 depending on the focal length of the lens). Next, you’ll want to play around with your shutter speed. We recommend having the shutter open from somewhere between 2-10 seconds. For the ISO, you’ll want to find the sweet balance of being bright enough but not so bright that the noise and graininess of the photo is extremely noticeable. When shooting with new moon conditions, set your ISO from 1600 to 6400. For Full moon conditions, you should be able to keep your ISO at 400-800

If you liked this post, you’ll love these too!
- Winter Photography Basics: Understanding ISO
- Winter Photography Basics: Understanding Shutter Speed
- Winter Photography Basics: Understanding Aperture


1 comment
Thank you for the post and insights, beautiful pictures.